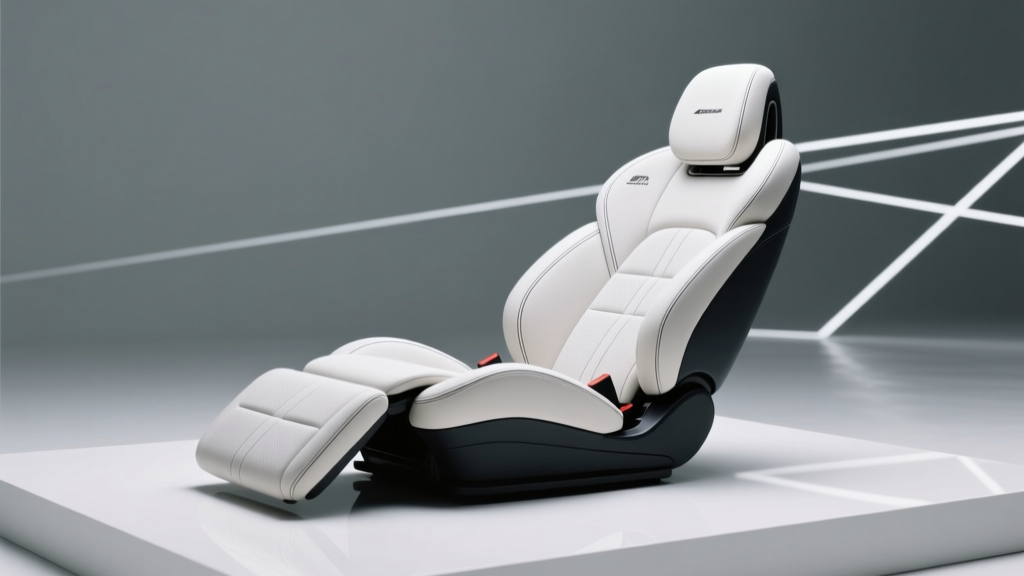
Reclining System Repair: Beginner’s Guide (2026)
A car seat that won?t recline properly can turn a quick commute into an ache-inducing chore. If the seatback slips, sticks, clicks, or refuses to move, it?s not just annoying?it can affect driving position, mirror visibility, and how well your seat belt fits. In a sudden stop, a compromised reclining system can also reduce the seat?s ability to keep you supported the way it was designed to.
The good news: many reclining system problems are fixable at home with basic tools and careful work. Whether you have a manual lever recliner or a power recliner with switches and motors, the core components are straightforward once you understand how they fit together. This beginner-friendly handbook walks you through diagnosis, removal, repair options, product suggestions, and the common mistakes that lead to repeat failures.
By the end, you?ll know how to identify what?s actually broken (handle, cable, gears, motor, or frame), how to safely access the mechanism, and when it?s smarter to replace parts?or call in a pro.
How a Car Seat Reclining System Works
Most seats use one of two designs: a manual recliner actuated by a lever/handle and cable, or a power recliner driven by a motor and switch. Both systems ultimately move a gear set at the seat hinge (the pivot point between seat cushion and seatback).
Common components you?ll encounter
- Recliner hinge/gear assembly: The toothed mechanism that locks the seatback angle.
- Handle/lever: What you pull or lift to release the lock (manual systems).
- Release cable: Links the handle to the recliner latch (common on many vehicles).
- Return spring: Helps the latch re-engage and keeps the lever feeling ?snappy.?
- Motor + gearbox: Moves the recline mechanism (power systems).
- Switch pack: Tells the motor to recline forward/back.
- Seat frame brackets: Hold everything in alignment; bends here can cause binding.
Safety First: What to Do Before You Touch the Seat
Seats aren?t just cushions?they often contain wiring for airbags, occupancy sensors, heated seats, and power functions. Take safety seriously so you don?t trigger an airbag light or damage a connector.
Pre-repair safety checklist
- Park on a flat surface and set the parking brake.
- Disconnect the negative battery terminal if the seat has any electrical connections (power seats, side airbags, heated seats). Wait 10?15 minutes before unplugging connectors.
- Move the seat to a convenient position before disconnecting the battery (slide it back to access front bolts, raise height if needed).
- Wear gloves and safety glasses?seat frames have sharp edges and springs can snap back.
- Take photos as you go. A few phone shots can save you an hour during reassembly.
Tools and Supplies for Beginner Recliner Repairs
You don?t need a full shop, but a few essentials make the job cleaner and safer.
- Socket set (commonly 10mm?15mm; some vehicles use Torx like T40/T50)
- Ratchet with extensions and a swivel
- Trim removal tools (plastic prybars)
- Phillips and flathead screwdrivers
- Needle-nose pliers (great for springs and cable ends)
- Torque wrench (helpful for seat mounting bolts)
- Penetrating oil (for stubborn bolts)
- White lithium grease or silicone grease (plastic-safe)
- Threadlocker (medium strength) for recliner fasteners where applicable
- Zip ties and painter?s tape (temporary cable management and labeling)
Symptoms and What They Usually Mean
Before pulling the seat apart, match the symptom to likely causes. This speeds up diagnosis and prevents replacing the wrong part.
Quick diagnosis chart
- Seatback won?t recline (manual): Broken handle, detached/broken cable, jammed latch, stripped recliner gear.
- Seatback reclines but won?t lock / slips: Worn recliner teeth, damaged latch, loose hinge bolts, bent frame.
- Handle pulls with no resistance: Cable snapped or popped out of its bracket, lever spline stripped.
- Clicking during recline: Stripped gear teeth, debris in gear, misalignment from impact or leaning hard on seatback.
- Power recline dead (no sound): Blown fuse, bad switch, disconnected harness, failed motor.
- Power recline hums but doesn?t move: Stripped gearbox, seized hinge, bent track/frame binding the mechanism.
Step-by-Step: Manual Reclining System Repair
Manual recliners are common on many trims and older vehicles. The most frequent beginner fix is a handle or cable issue.
Step 1: Remove seat side trim and inspect the handle
- Locate screws hidden behind small plastic caps on the seat?s side trim panel.
- Use trim tools to gently pry the panel off; work slowly to avoid snapping clips.
- Inspect the recline handle/lever:
- If it?s loose or spins freely, the internal splines may be stripped.
- If it?s cracked, replace it?glue rarely holds long-term.
Step 2: Check the recline cable (if equipped)
- Follow the cable from the handle to the recliner hinge.
- Look for:
- A cable end popped out of the bracket
- Frayed strands near the end fitting
- A kinked cable sheath that prevents smooth pull
- If the cable is intact but sticky, apply a small amount of silicone spray at the ends (avoid soaking foam or upholstery).
Step 3: Access the recliner hinge and latch
- If you can?t see the mechanism clearly, you may need to remove the seat:
- Unbolt the seat (usually 4 floor bolts).
- Tilt the seat back to access electrical connectors.
- Unplug connectors carefully?never pull on wires.
- With the seat on a bench or clean floor, examine the hinge:
- Check for missing bolts or looseness.
- Look for metal shavings (a clue that gears are grinding).
Step 4: Fix common manual recliner failures
- Detached cable end: Re-seat it in its bracket and verify the handle pulls the latch arm fully.
- Broken cable: Replace with an OEM or vehicle-specific aftermarket cable. Universal cables can work, but correct length and end fittings matter.
- Sticky latch: Clean debris, then apply a light coating of white lithium grease to metal-on-metal contact points (avoid over-greasing).
- Worn or slipping recliner gear: Replace the recliner hinge assembly. This is the safest route?worn teeth can fail again even if you ?make it work.?
Real-world example
If your recline handle suddenly feels ?weightless? after someone climbed into the back seat and yanked the seat forward, the cable often pops out of its retainer at the hinge. Re-seating the cable and tightening the retainer tab can restore normal function in under an hour.
Step-by-Step: Power Reclining System Repair
Power recliners add electrical troubleshooting, but the process is still approachable if you go in order: power supply ? switch ? motor ? mechanism.
Step 1: Check the basics (fuse and connectors)
- Identify the seat/recline fuse using your owner?s manual or fuse box diagram.
- Replace any blown fuse with the correct amperage (don?t ?upgrade? the fuse rating).
- Inspect under-seat connectors for:
- Loose plugs from items shoved under the seat
- Corrosion from wet carpets
- Pulled wires from aggressive seat movement
Step 2: Test the switch and motor
- Listen first: Press recline and listen for motor noise.
- No noise: likely switch, wiring, or motor dead.
- Humming/clicking: motor gets power but can?t move the mechanism (binding or stripped gears).
- Quick swap test (if applicable): Some vehicles use the same switch module left/right. Swapping can confirm a bad switch without a multimeter.
- Multimeter test (best practice): Check for voltage at the motor when pressing the switch. If power is present but the motor doesn?t turn, replace the motor/gearbox.
Step 3: Inspect for binding or mechanical failure
- Remove side trim to view the motor and recline linkage.
- Look for bent brackets, shifted hinge alignment, or foreign objects.
- If safe and accessible, disconnect the motor from the recliner gearbox and check:
- Does the motor spin freely when commanded?
- Does the seatback move manually (some designs allow slight movement) or is it jammed?
Step 4: Replace a power recline motor (typical procedure)
- Disconnect battery negative terminal and wait 10?15 minutes.
- Unplug motor connector.
- Remove motor mounting screws/bolts (often small Torx/hex).
- Install the new motor in the same orientation; align the gear engagement carefully.
- Reconnect wiring, reassemble trim, reconnect battery, then test operation.
When to Repair vs Replace Parts
Some issues are worth repairing; others are safer and more cost-effective to replace outright.
Repair is usually fine when
- A cable end popped loose
- A plastic handle cracked or stripped
- A latch is dirty or lightly sticking
- A switch is intermittent (and the rest of the mechanism is solid)
Replacement is the smart move when
- The seatback slips under load (worn teeth/latch)
- The recliner gear has visible damage or metal shavings
- The seat frame is bent from an accident or heavy force
- A power motor/gearbox is stripped (rebuilds are rarely worth it for beginners)
Product Recommendations (Practical Picks)
Exact fit varies by make/model/trim, so use your VIN when shopping for recliner hinges, motors, cables, or handles. These categories and features tend to deliver better results than bargain-bin parts.
Recommended parts and what to look for
- OEM recliner hinge assembly: Best for safety-critical ?slipping seatback? issues. Look for updated part numbers if your model has a known wear issue.
- Vehicle-specific aftermarket cable/handle kits: Choose kits that include correct end fittings and bracket clips. Avoid universal cables unless you can match length precisely.
- Power recline motor with integrated gearbox: Prefer assemblies with good connector fitment and a warranty (at least 12 months).
- Grease: White lithium grease for metal gears and pivots; silicone grease for plastic-on-plastic contact points.
Quick comparison: OEM vs aftermarket
- OEM: Higher price, best fit, typically longer-lasting, safest for hinge/gear components.
- Aftermarket (quality brands): Good value for handles, cables, switches, and some motors?read fitment notes carefully.
- Used parts: Can be a budget win for trim pieces and handles, but be cautious with recliner hinges (unknown wear history).
Common Mistakes to Avoid
- Skipping the battery disconnect: Unplugging airbag-related connectors can set warning lights or worse.
- Over-greasing the mechanism: Excess grease attracts grit and can speed up wear.
- Ignoring seatback slip: If the seat won?t hold angle, don?t ?live with it.? Replace the hinge/latch assembly.
- Forcing the recline: Muscle can bend brackets and misalign gears, turning a small fix into a bigger repair.
- Mixing bolts or losing spacers: Seat hardware matters. Lay fasteners out in order or label them in bags.
- Buying parts without confirming seat option codes: Manual vs power, 2-door vs 4-door, side airbag variations?all can change part fit.
Practical Tips for a Cleaner, Faster Repair
- Work on a blanket or cardboard: Keeps the seat rails from scratching floors and helps you find dropped clips.
- Mark hinge alignment: A paint pen line across brackets helps you return parts to the same position.
- Test before full reassembly: Temporarily reconnect wiring and verify recline operation before snapping trim back on.
- Don?t forget the ?feel? test: A good recliner locks solidly with minimal play and releases smoothly without grinding noises.
FAQ: Reclining System Repair for Beginners
Why does my seat recline handle move but the seatback doesn?t?
Most commonly the release cable has snapped, stretched, or popped out of its bracket. A stripped handle spline can cause the same ?moves but does nothing? feeling. Remove the side trim and confirm the handle actually pulls the latch arm at the hinge.
My seatback slips backward while driving?can I tighten something to fix it?
If the seatback won?t hold position under load, the issue is usually worn recliner teeth or a damaged latch. Tightening bolts rarely solves it for long. For safety, replacement of the recliner hinge/latch assembly is typically the correct fix.
Do I have to remove the entire seat to repair the recliner?
Not always. Handles, trim, switches, and some cables can be serviced with the seat installed. If you need to access the hinge assembly, motor, or hidden fasteners, removing the seat makes the job easier and reduces the chance of breaking trim clips.
What kind of grease should I use on the recliner mechanism?
White lithium grease works well for metal pivots and gears. Use it sparingly and wipe away excess. For plastic contact points, silicone grease is a safer choice. Avoid heavy axle grease?it can collect dirt and gum up moving parts.
My power recline stopped working, but other seat functions still work. What?s the likely culprit?
A failed recline switch or a bad recline motor/gearbox are common when other directions still function. Start with fuse and connectors, then test for power at the recline motor while pressing the switch.
Will a used recliner hinge from a junkyard be safe?
It can be, but it?s a gamble because you can?t easily measure internal wear. Used hinges are riskier than used trim pieces. If your seatback was slipping, consider OEM new or a high-quality replacement with a warranty.
Next Steps: A Simple Plan to Get Your Seat Reclining Again
- Identify the symptom (stuck, slipping, clicking, no power) and match it to likely causes.
- Inspect the easy-access items first: handle, cable ends, switch connector, fuse.
- Decide repair vs replacement based on safety and wear?especially if the seatback won?t lock solidly.
- Test operation before final reassembly, then torque seat bolts properly and verify seat belt routing and function.
If you want to go further, consider learning basic seat upholstery panel removal, cleaning under-seat connectors, and diagnosing other interior comfort systems like lumbar support and heated seats. Keep exploring more beginner-friendly interior repair guides on carinteriormix.com.